
Shopify
Installation guide.
Step 1. Installation
Download the BOX NOW app:
BoxNow - Automated process for BoxNow parcel delivery lockers. | Shopify App StoreThen, in Shopify’s administration page, in Apps section, BOX NOW option will appear.
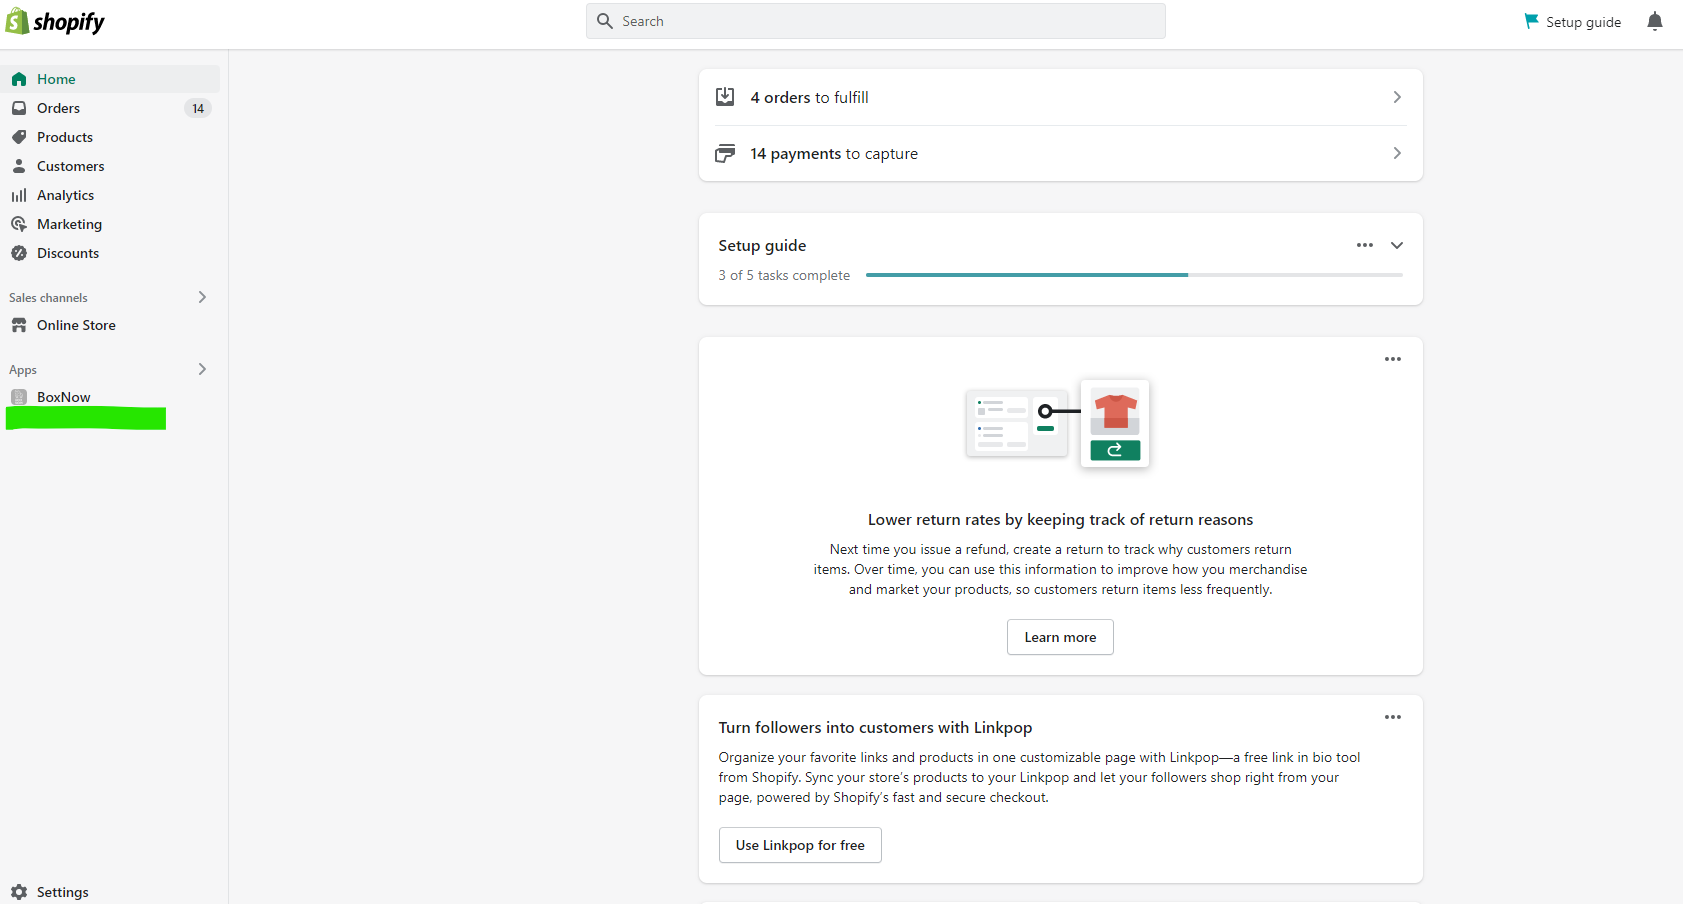
Step 2: App Configuration
Click BOX NOW → Settings
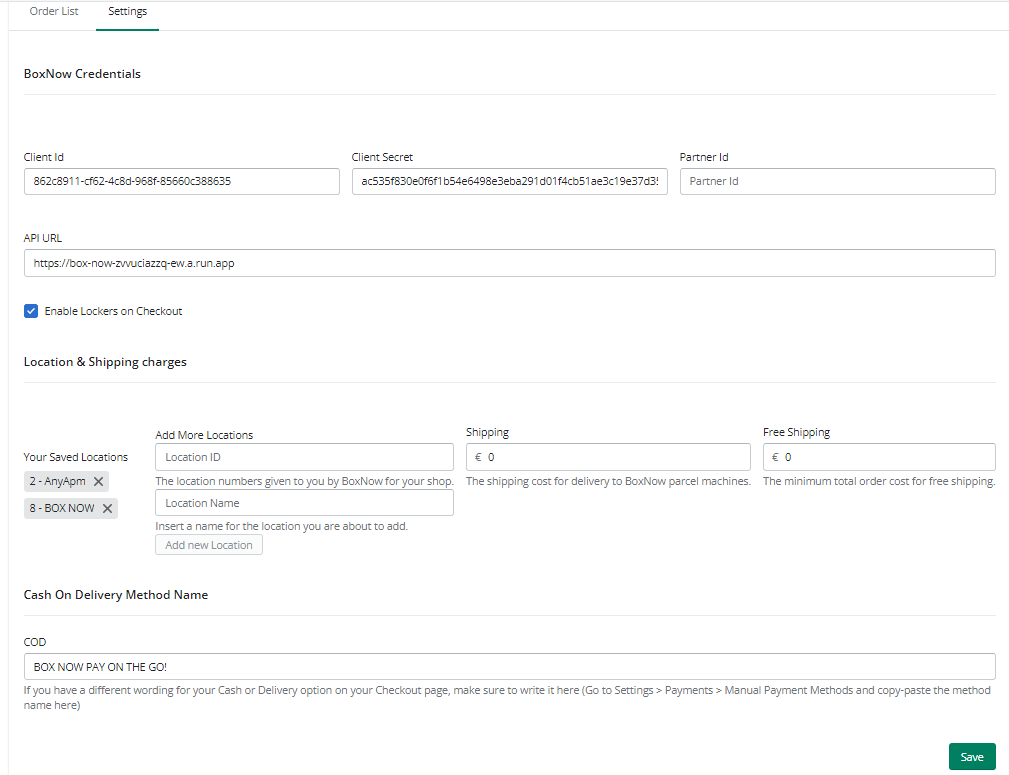
Complete the field with the relative information - codes provided by BOX NOW staff:
Client ID: Client ID as provided (π.χ. 9d8gg3de-8119-4tea-991e-37ff20eq5e50).
Client Secret: Client Secret as provided (e.g. c1144abc1db1f3186442a4ec3d3e953de0105c12759a2d82771a888256659e67f).
Partner Id: Fill in the provided partner_id (e.g. 1)
API URLComplete the API URL (e.g. https://api-production.boxnow.gr).
Enable Lockers on Checkout: By checking this field Box Now service is being displayed in order’s checkout.
Add More Locations: Here you register your warehouse, filling in id and name, (e.g. 8 - Partner) and then “add new Location”. In case more than one warehouse need to be registered you follow the above as many times as needed.
Shipping: Shipping cost.
Free Shipping: The cost from which no shipping fee will be charged.
*The “Shipping” and “Free Shipping” fields must always have a value.
COD: Complete the provided verbal. Save changes.
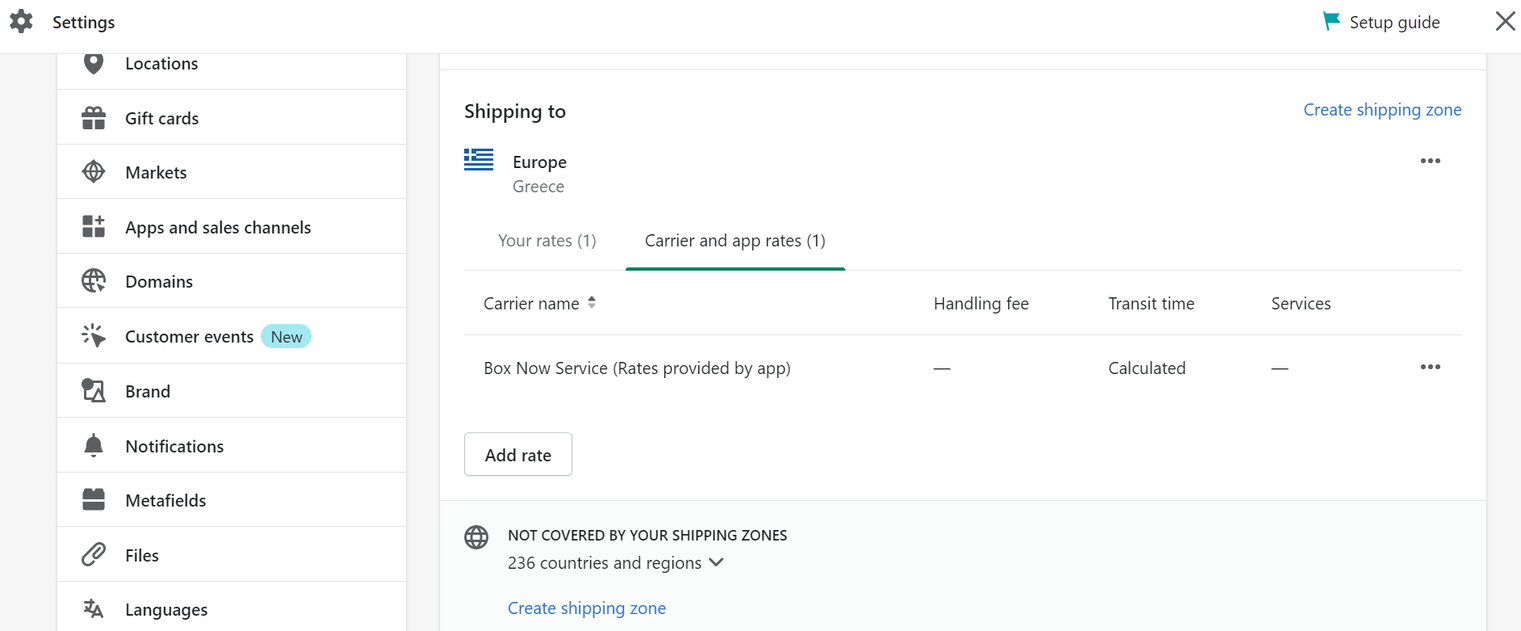
Step 3: Activation
Activating BOX NOW as a shipping method.
Settings → Shipping and delivery → Manage → Carrier and app rates
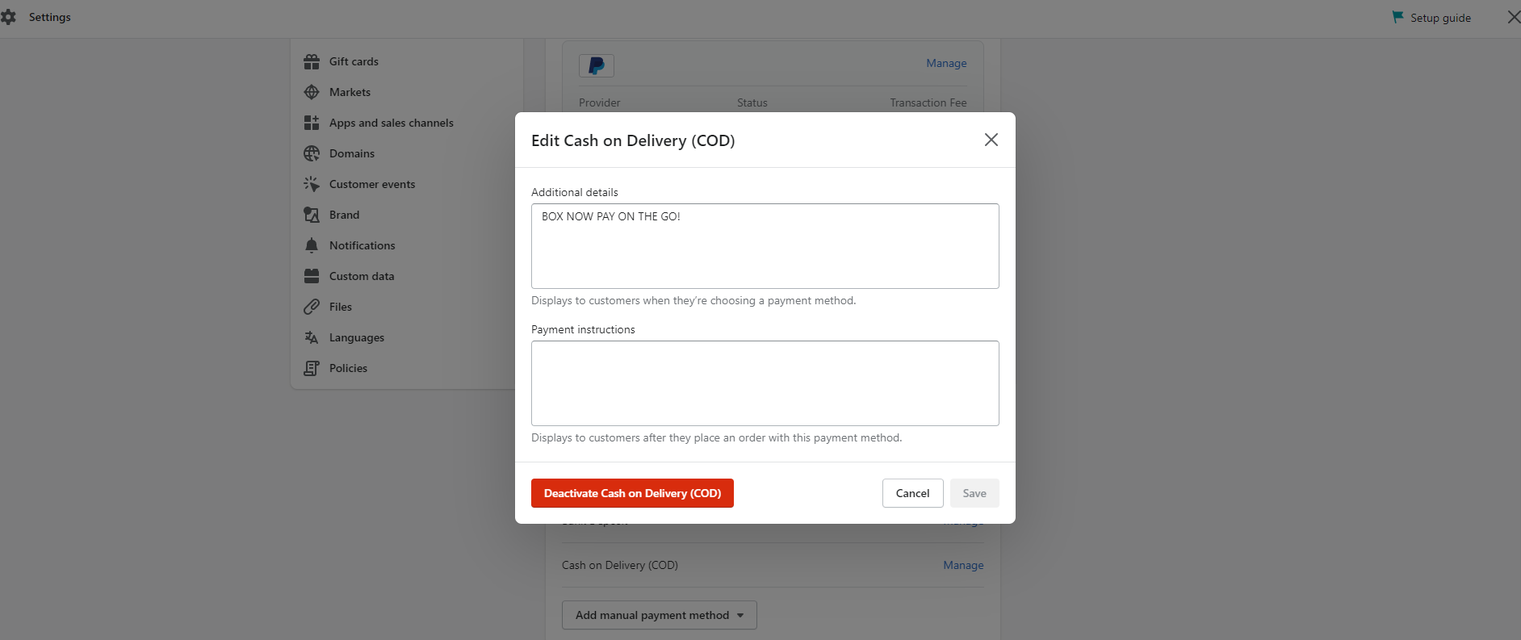
Step 4: Cash On Delivery verbal
You need to register the verbal for COD in the payment settings section in order to appear at the checkout. Settings → Payments → Cash on Delivery (COD) → Manage → Additional details.
Fill in the verbal you used in the app configuration (e.g. BOX NOW PAY ON THE GO).
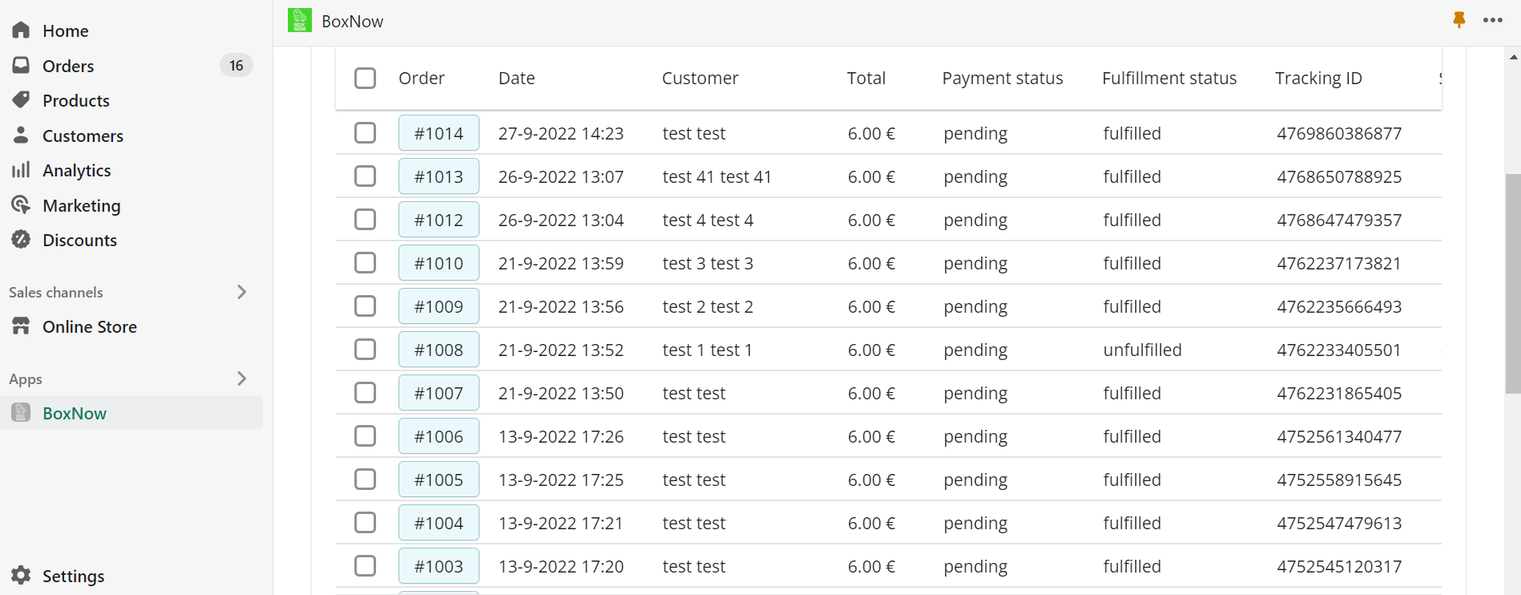
Step 5: Order management
By choosing the Box Now app, a list with all the e-shop’s orders appears. To show only Box Now related orders you need to add the Box Now filter. This will be achieved through the app SHOPIFY FLOW.
From your Shopify’s administrative home page click on the Search bar.
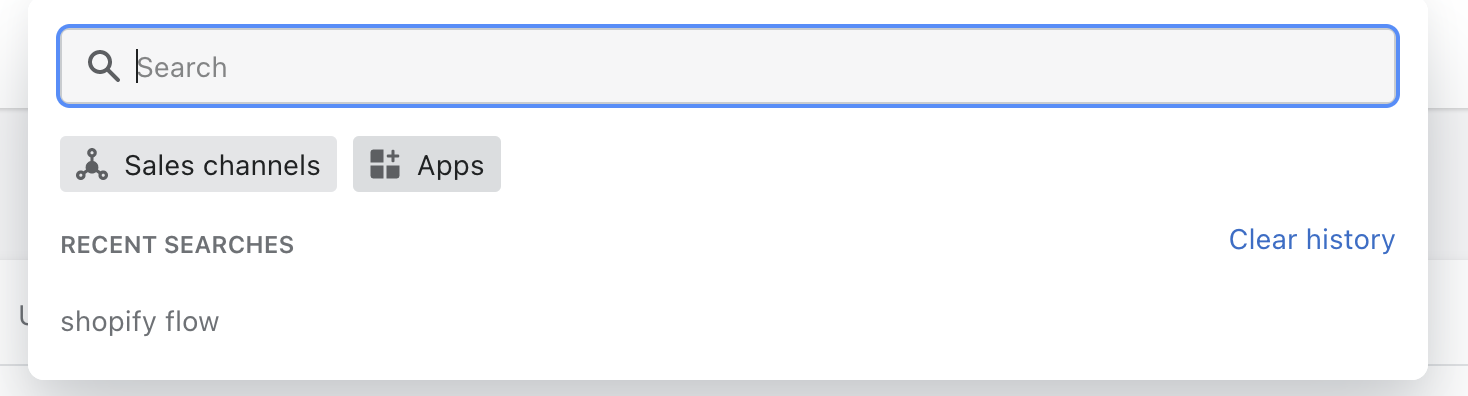
Then click on the Apps category and search for “Shopify Flow”.

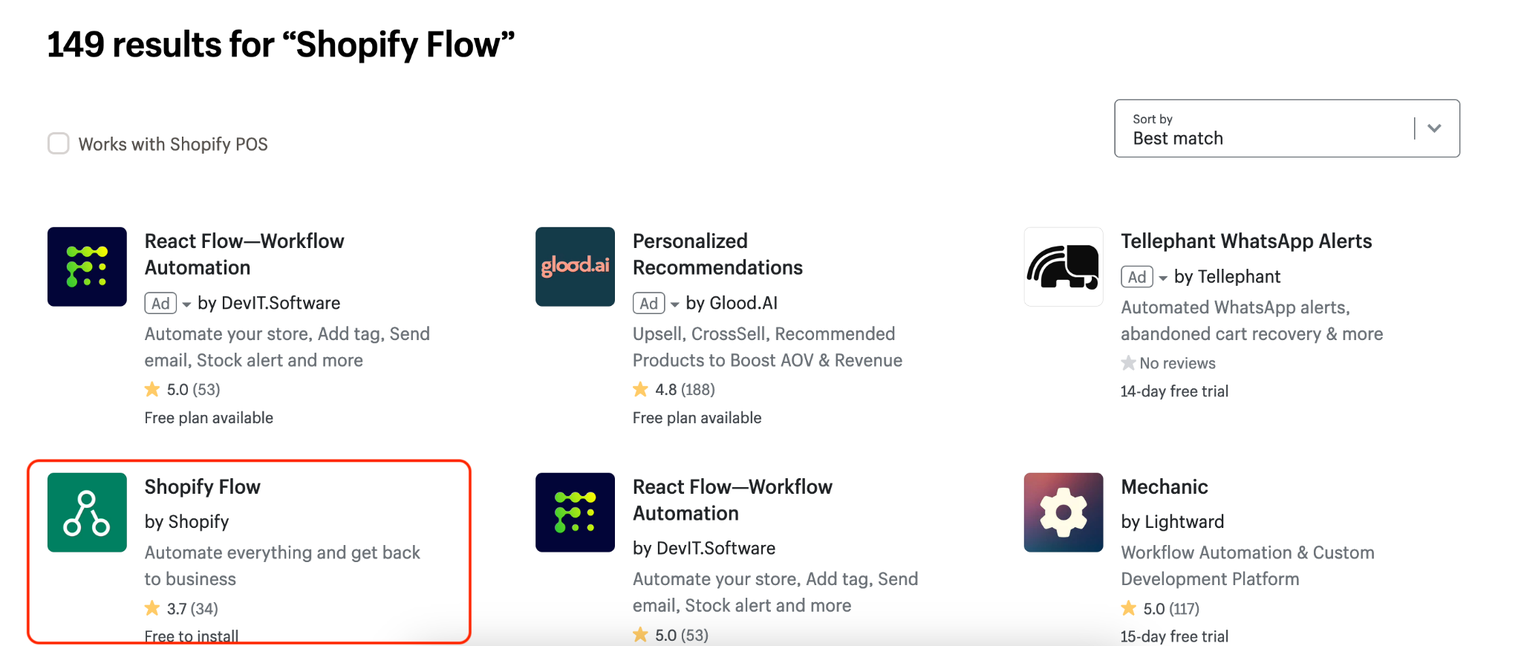
Afterwards, click on Search for “Shopify Flow” in the Shopify App Store and wait for the Shopify app store to load. When the page loads click on Shopify Flow by Shopify.
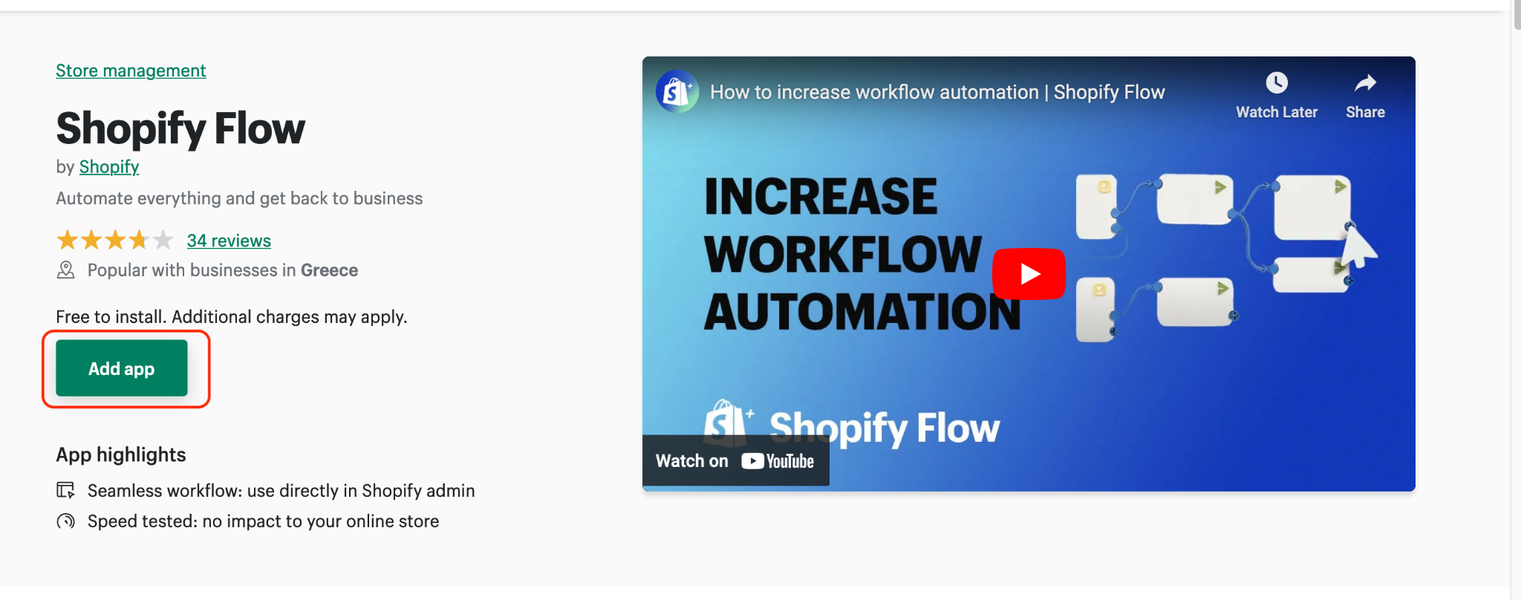
Finally click on Add app
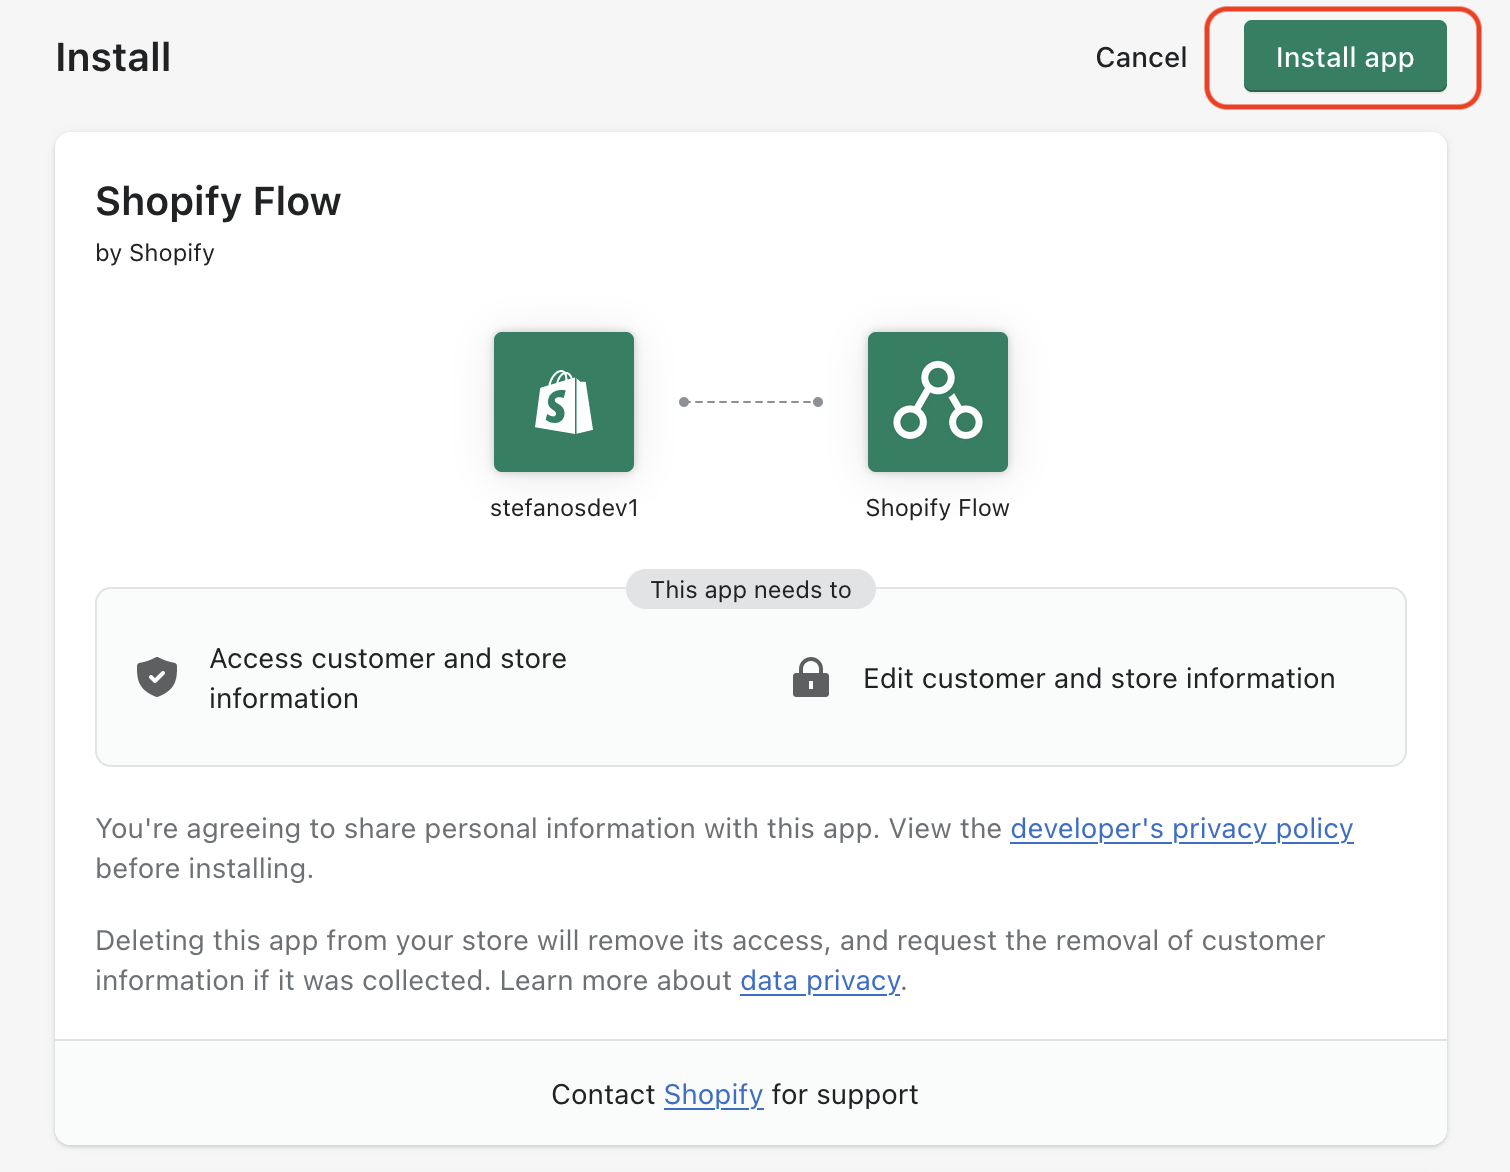
and Install app. Now the app has been configured in your e-shop and you can find it in the Apps section.
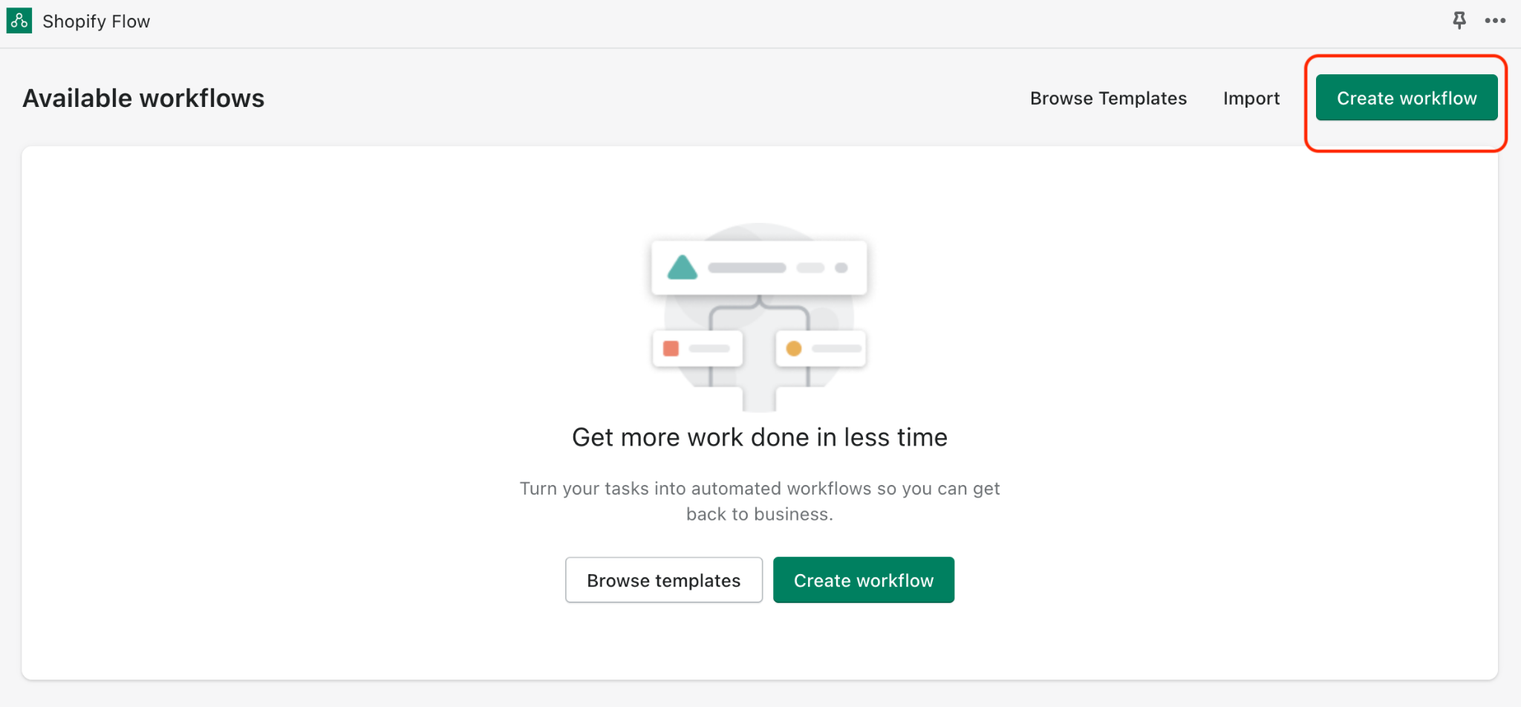
You can check the Shopify Flow app by clicking the Apps under the Sales Channels left in your menu.Click on the button Create workflow to create a new workflow.
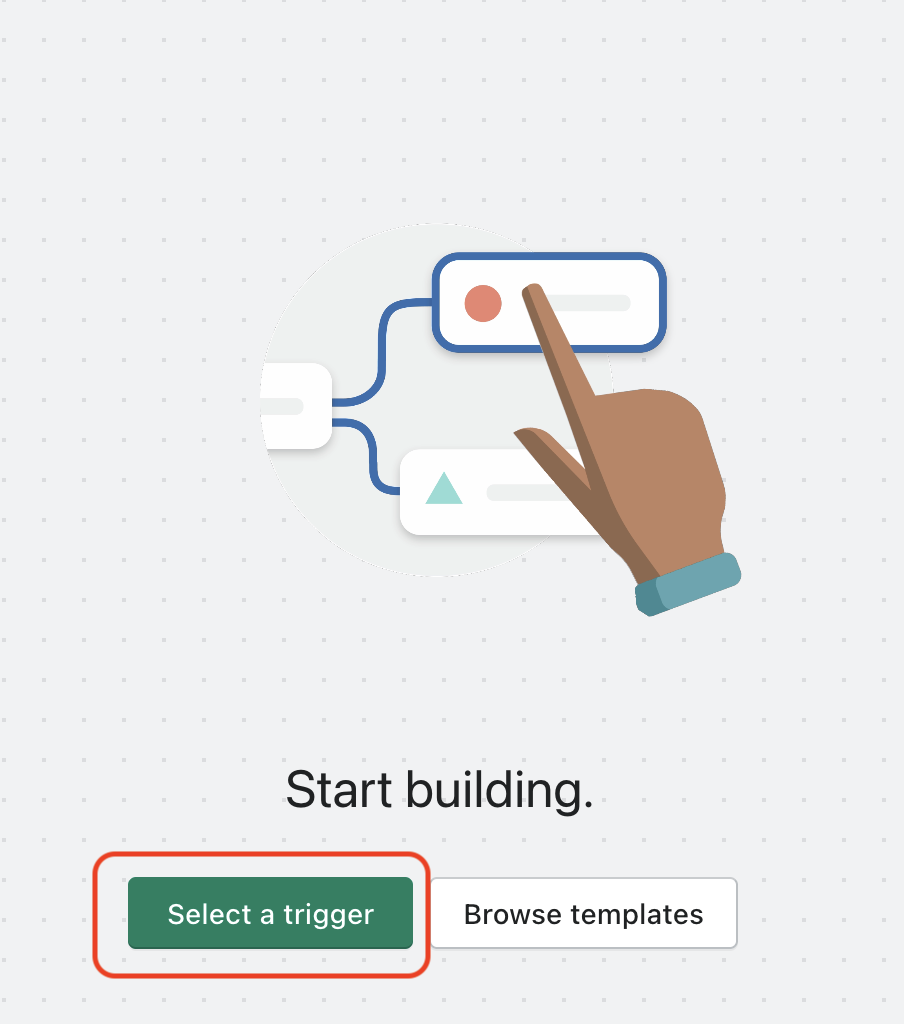
Click on the button Select a trigger and start by creating a condition which will trigger our workflow. In this instance we need to check , after the order is created if a BoxNow locker was chosen during the checkout and whether it has a “box-now” order tag on your administrative console.
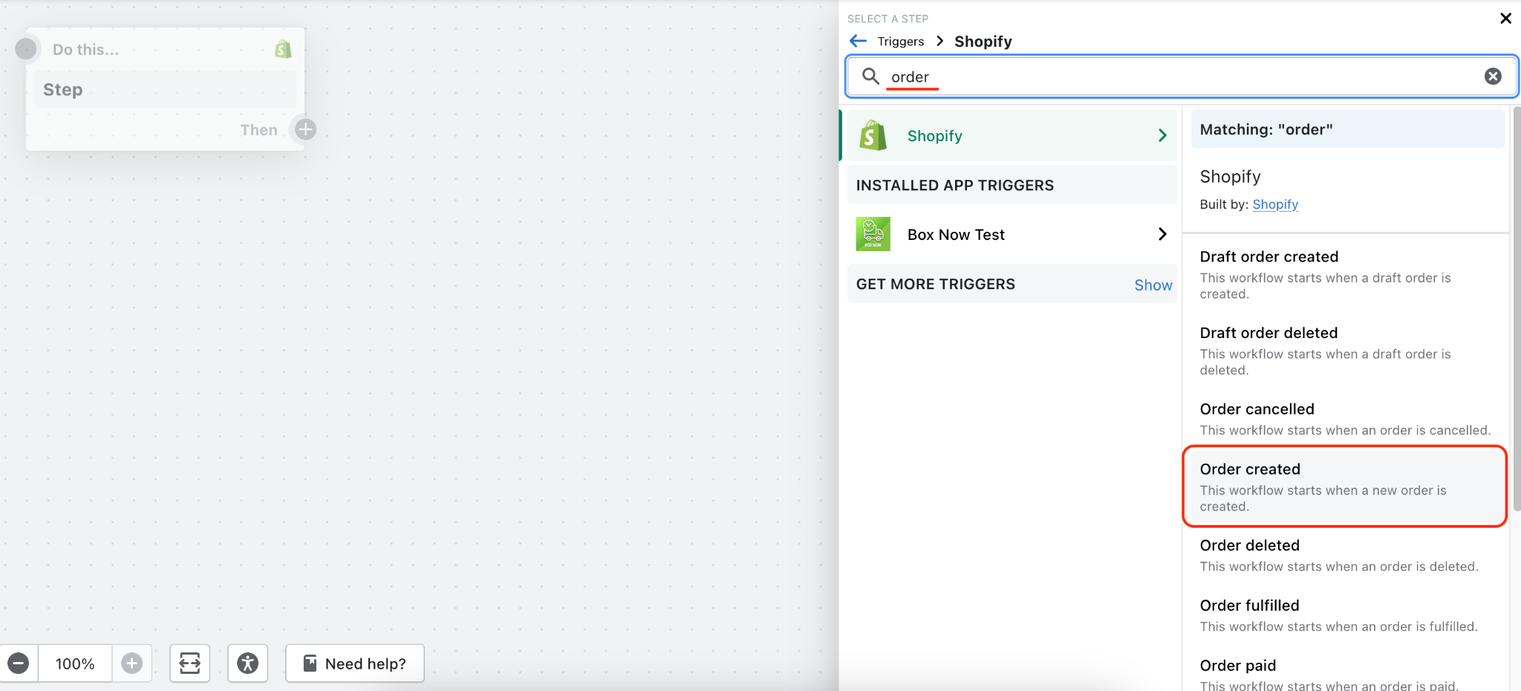
In the menu that loaded click on the right side at the Search field and type “order”. After the results are loaded click on the Order created.
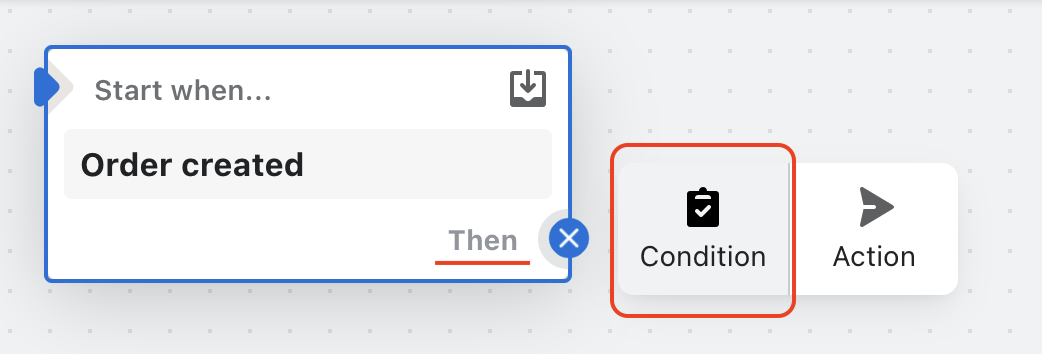
Click on + next to Then and afterwards on Condition to add the condition.
Πατήστε πάνω στο Click on Add criteria..

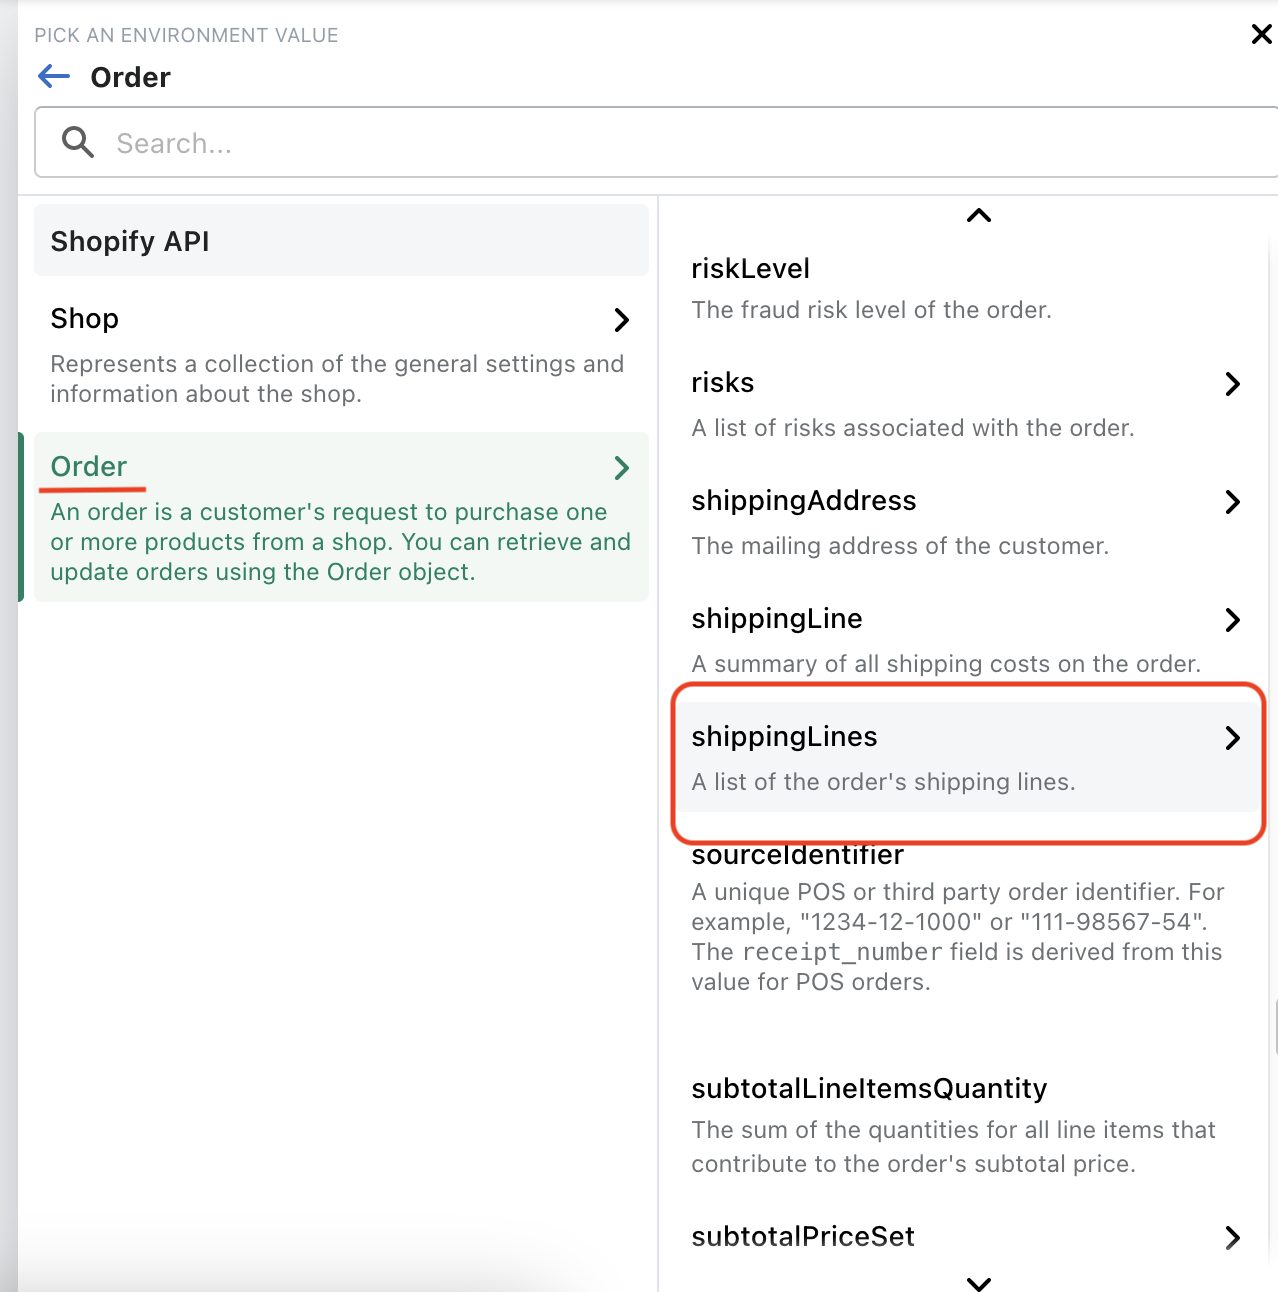
On the menu that pops up click on Order on the left and then scroll on the fields that will show up on the right until you find the filed “shippingLines”
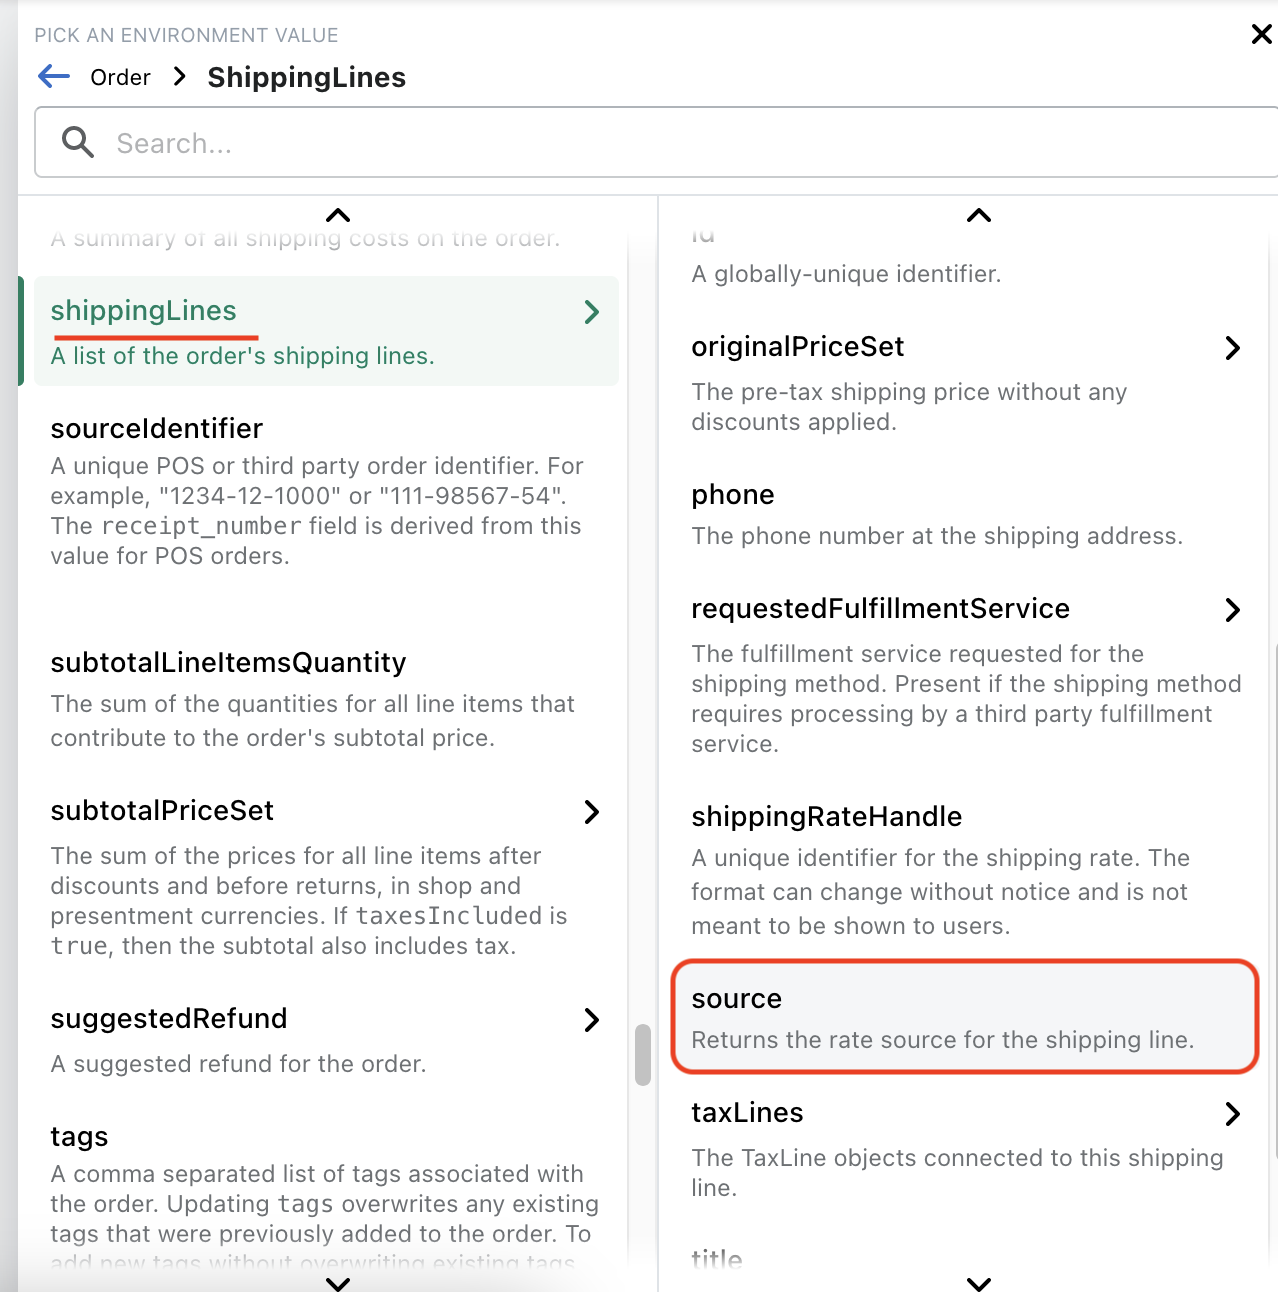
Afterwards scroll on the shippingLines fileds on the right and click on source.
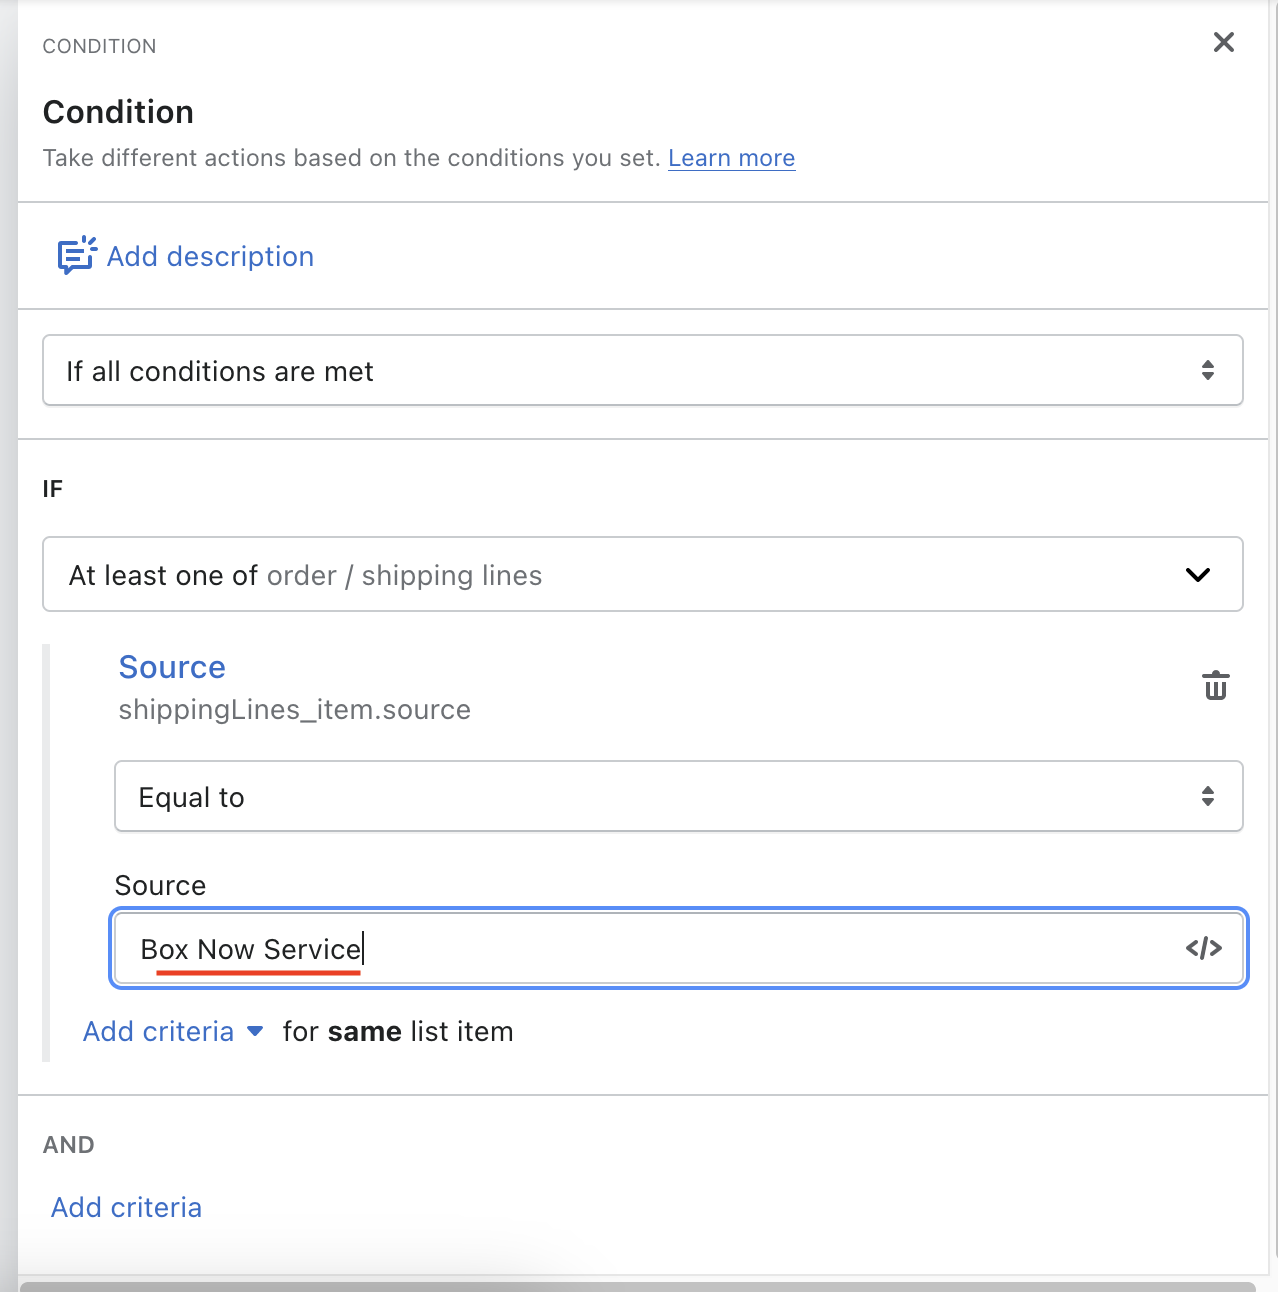
Finally, click on “Enter source” and type “Box Now Service”
Now click on + on the right side of Then in the condition you just created and afterwards on Action.
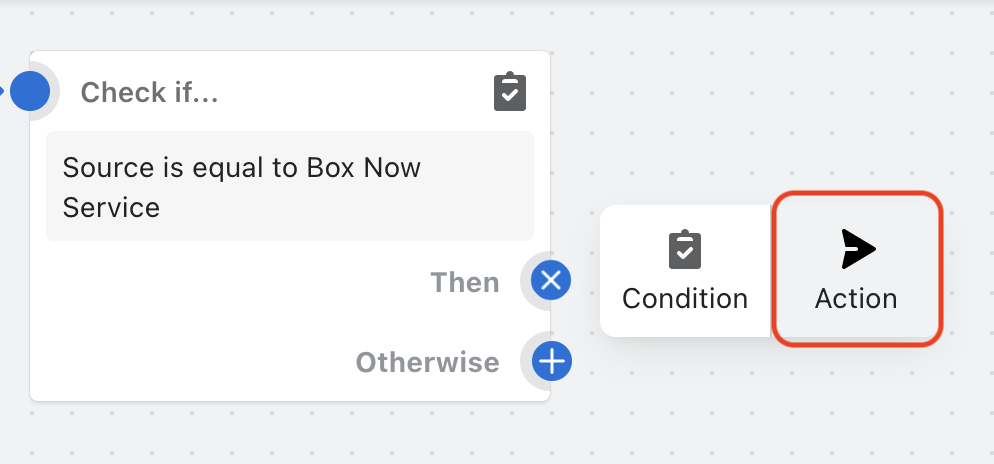
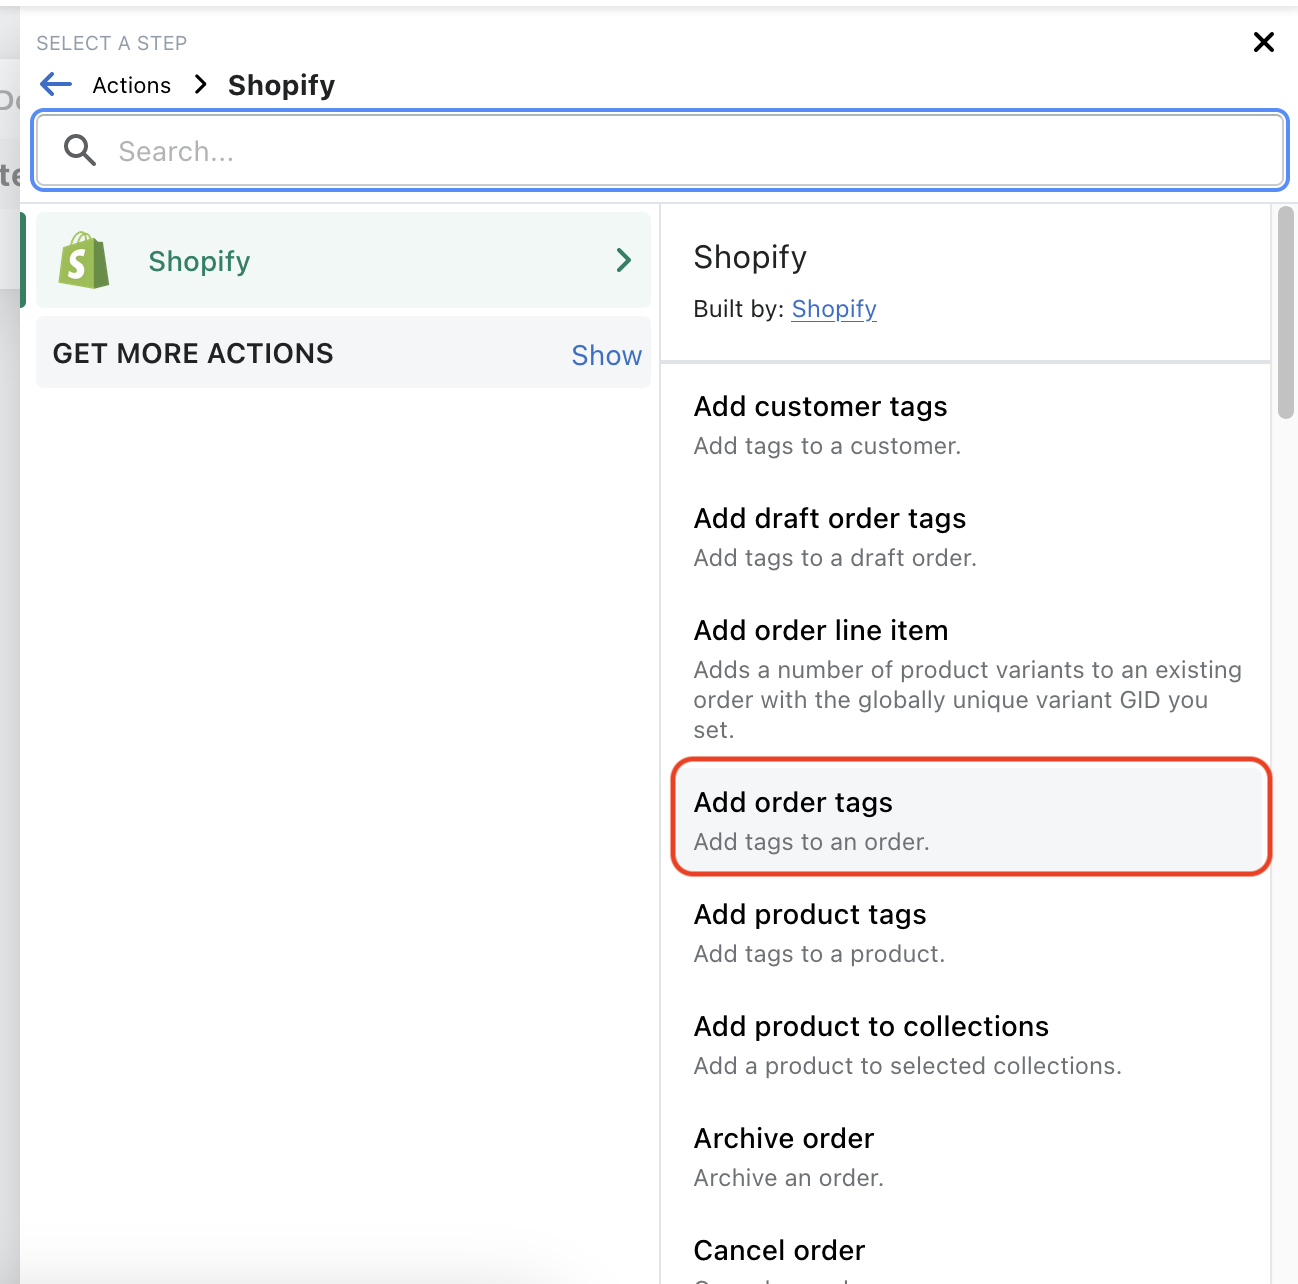
Here you will set up the process that will me executed when the above condition is met. In the menu that will appear on the right side of your screen you can already see and click on the button “Add order tags”, otherwise look for it in the Search and click it.
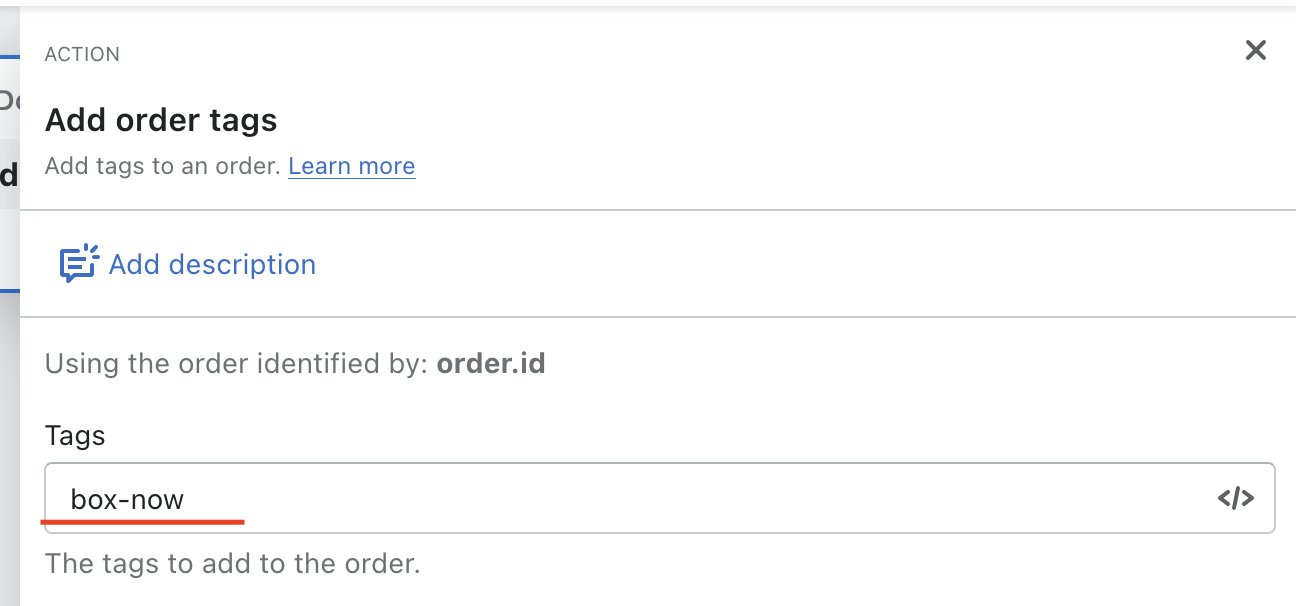
Finally, click on the filed “Start typing” and type “box-now”.
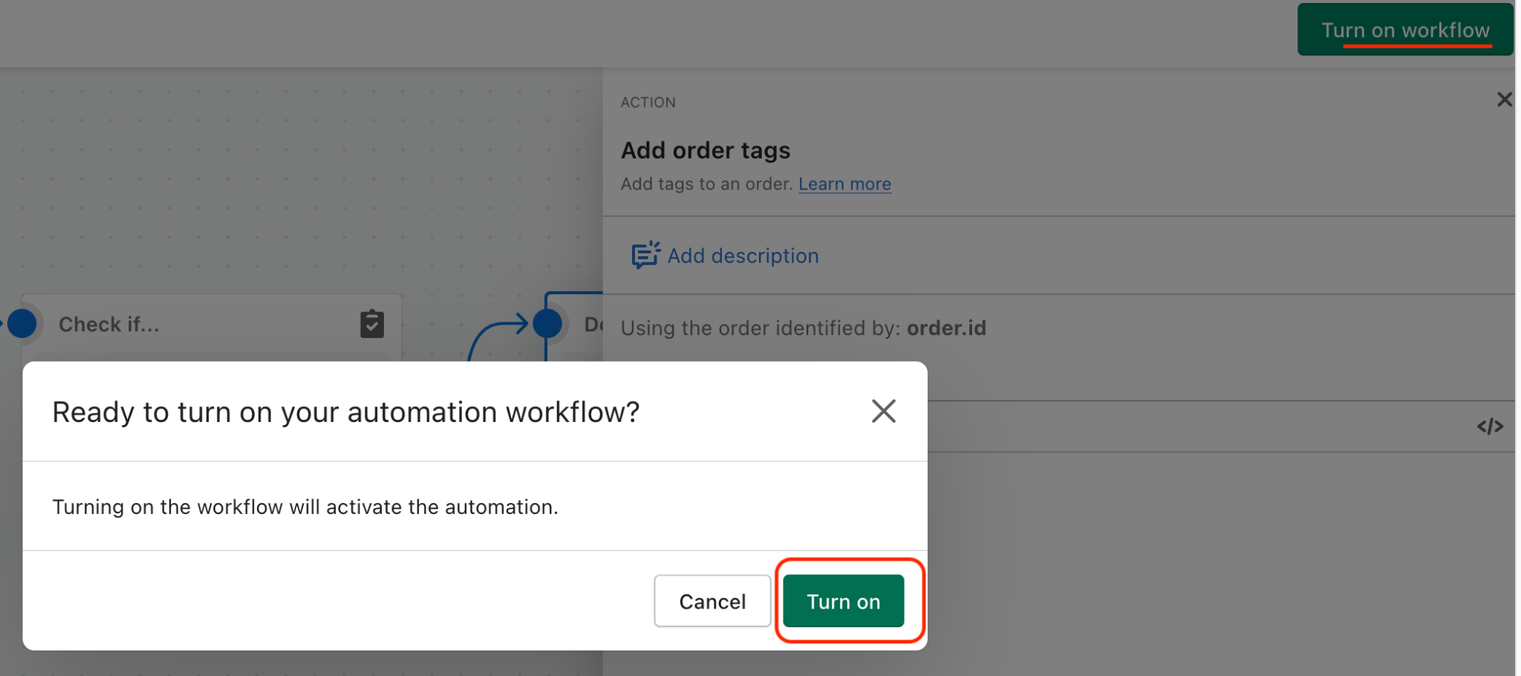
Now the only thing left is for the workflow to be activated. Click on the button at the top of the right side “Turn on workflow” and then on the window that appears click “Turn on” for the process to be completed. A message will appear that the workflow has been activated and then when you go back you can see it as Active instead of Draft.
You can now complete a test order to see that the condition has been configured properly and the order tag has been added. In addition you can check under the Workflows your Run history which includes your history of completed workflows (up to 7 days old).
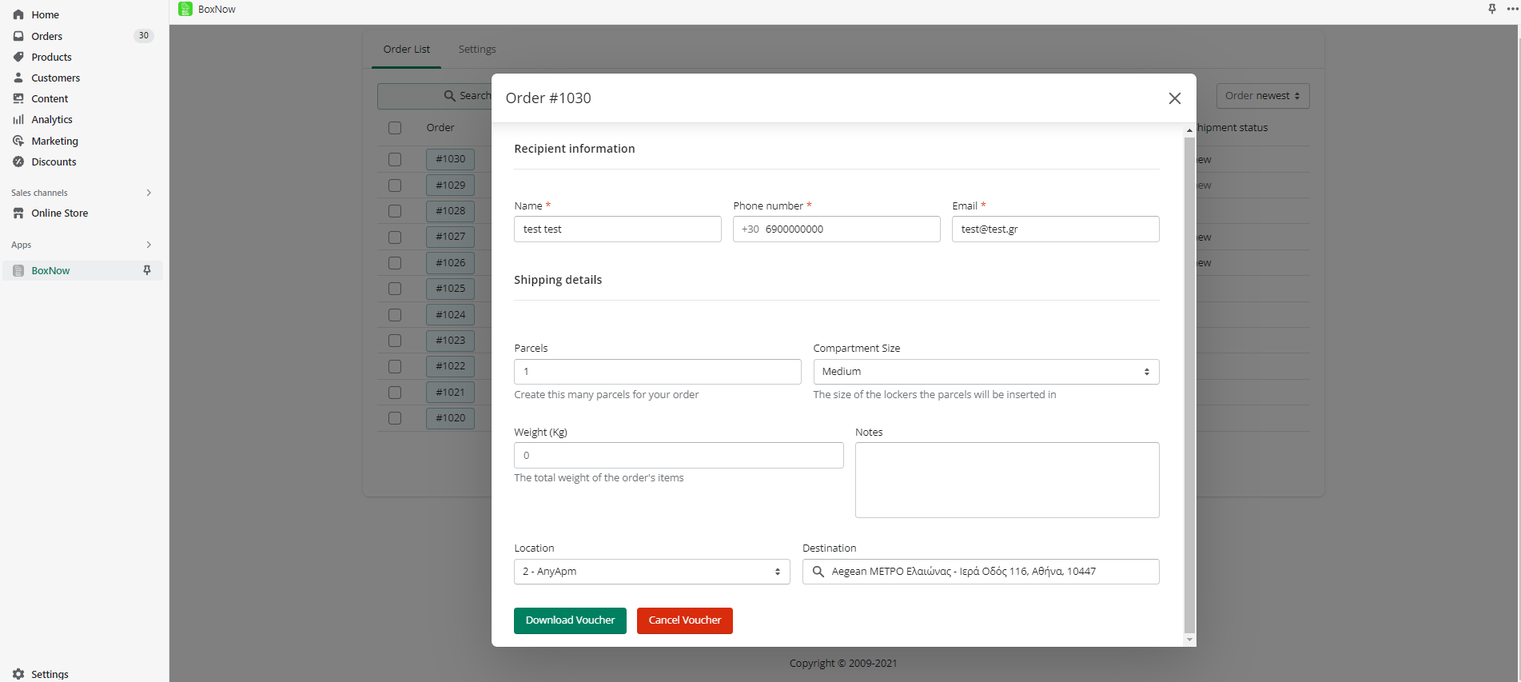
For creating individual vouchers, we choose an order and select Create Voucher → Download Voucher.
You can change the amount of parcels (vouchers), by typing the desired amount in the field Parcels.
*In case that the agreed deal between the e-shop and BoxNow is that you will put the parcels in the locker on your own( any apm), you can choose the size of the locker from the Compartment Size section (Small, Medium & Large). In this case the warehouse_id must have the value “2”.
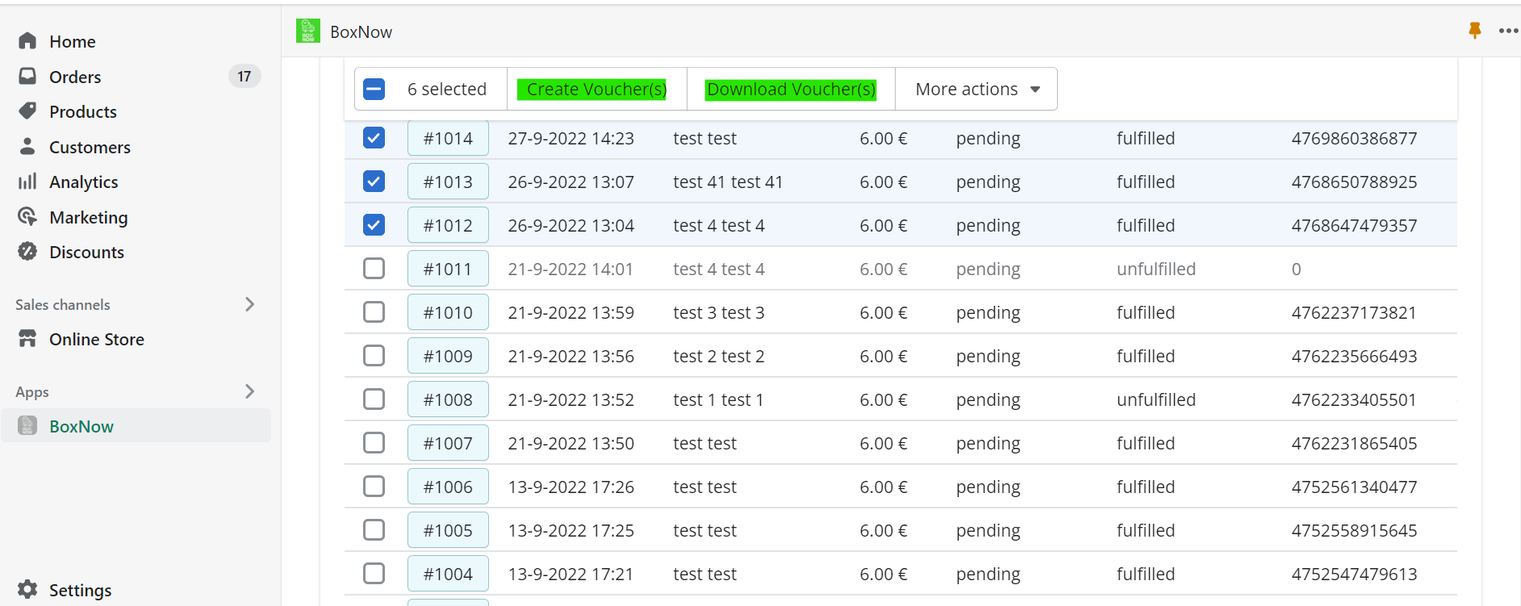
In case of multiple vouchers, we choose the orders and select Create Voucher(s) → Download Voucher(s)
ATTENTION:
- To use the BOX NOW app you need one of the following subscription plans:
- basic + carrier shipping monthly or yearly subscription
- advanced + carrier shipping subscription
- plus subscription provided for free.
- Test the plugin using only the Stage API keys.
- Choose the stage locker: Aegean ΜΕΤΡΟ Ελαιώνας, locker id: 9, Address: IEPA OΔOΣ 116, 10447.
- To get the order’s voucher you need to set the order as “Completed” first.
Support
For any questions regarding the above please call at:+302111005330 or email us at: ict@boxnow.gr